Arduino的SD卡模块:如何读取/写入数据

文件列表(压缩包大小 3.27K)
免费
概述
在本教程中,您将在一个简单的项目中学习如何将SD和micro SD卡与Arduino一起使用以测量环境温度。
需要的元件
Arduino UNO
ElectroPeak Micro SD TF卡适配器模块
ElectroPeak DS3231 I2C RTC模块
ElectroPeak公对母跳线
ElectroPeak微型SD卡
Arduino IDE
原理及流程
总览
存储数据是每个项目中最重要的部分之一。根据数据类型和大小,有几种存储数据的方法。SD和micro SD卡是存储设备中最实用的一种,用于移动电话,小型计算机等设备中。
在本教程中,您将学习如何在Arduino上使用SD和micro SD卡。
最后,作为一个简单的项目,您将每小时测量一次环境温度并将其存储在SD卡中。
您将学到什么
- 如何使用SD和Micro SD卡
- 将数据写入SD卡
- 从SD卡读取数据
什么是SD和Micro SD卡模块?
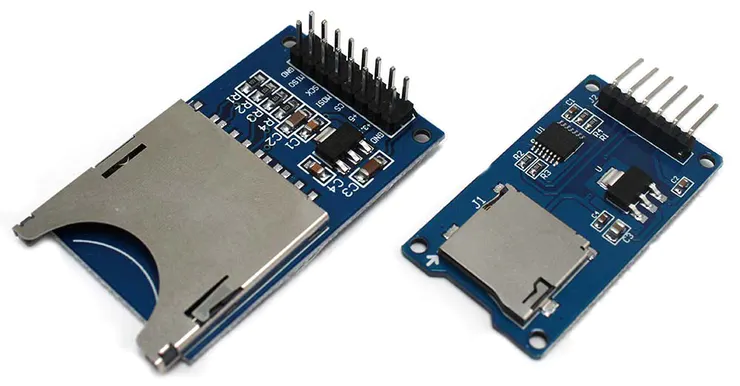
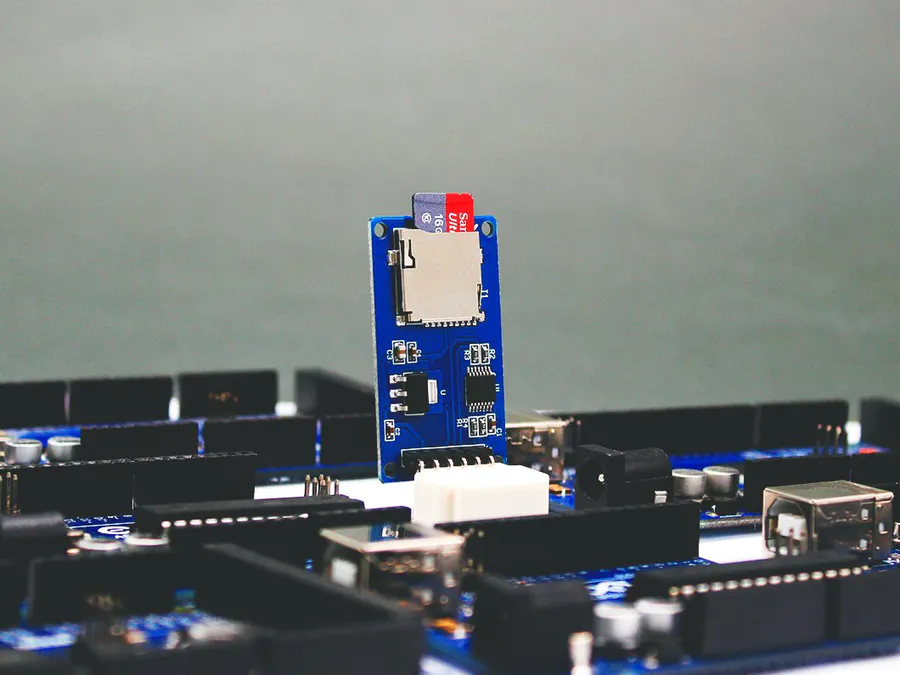
SD和Micro SD卡模块使您可以与存储卡进行通信,并在其上写入或读取信息。模块以SPI协议进行接口。
要将这些模块与Arduino一起使用,您需要SD库。该库默认安装在Arduino应用程序上。
注意:这些模块不能处理大容量存储卡。通常,这些模块的最大可识别容量对于SD卡为2GB,对于微型SD卡为16GB.
重要的SD模块库命令
下表提供了实用SD库命令的简要说明:
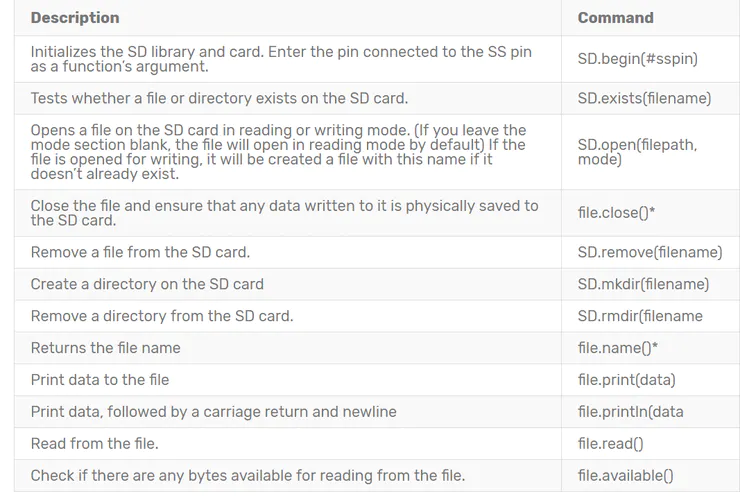
* file是File类的实例。
您可以在此处找到有关SD库的更多信息。
如何在Arduino上使用SD和Micro SD卡?
提示:本教程中使用的模块是micro SD模块,但是,您也可以将代码和教程用于SD模块。
电路图
使用此模块非常简单,其配置如下:
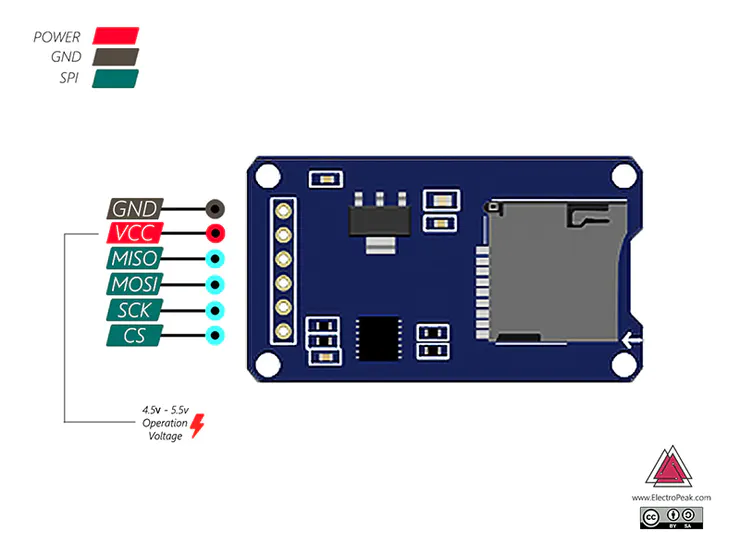
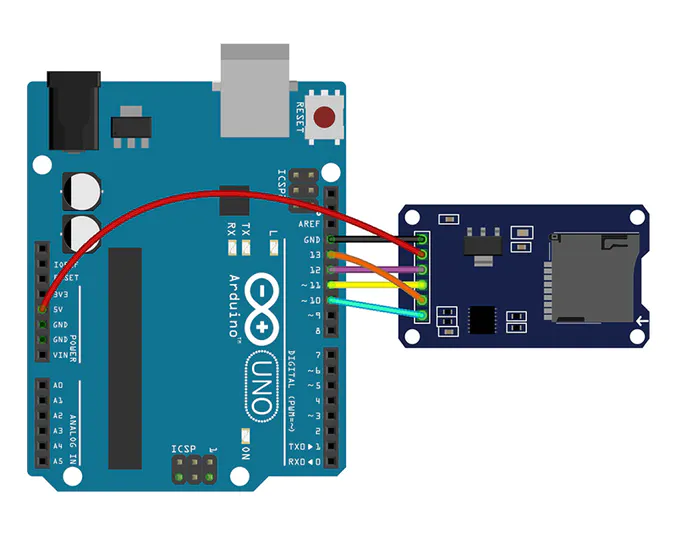
代码
使用Arduino在SD卡上写入数据:
#include <SPI.h>
#include <SD.h>
File myFile;
void setup() {
// Open serial communications and wait for port to open:
Serial.begin(9600);
while (!Serial) {
; // wait for serial port to connect. Needed for native USB port only
}
Serial.print("Initializing SD card...");
if (!SD.begin(10)) {
Serial.println("initialization failed!");
while (1);
}
Serial.println("initialization done.");
// open the file. note that only one file can be open at a time,
// so you have to close this one before opening another.
myFile = SD.open("test.txt", FILE_WRITE);
// if the file opened okay, write to it:
if (myFile) {
Serial.print("Writing to test.txt...");
myFile.println("This is a test file :)");
myFile.println("testing 1, 2, 3.");
for (int i = 0; i < 20; i++) {
myFile.println(i);
}
// close the file:
myFile.close();
Serial.println("done.");
} else {
// if the file didn't open, print an error:
Serial.println("error opening test.txt");
}
}
void loop() {
// nothing happens after setup
}
以上代码执行的结果:
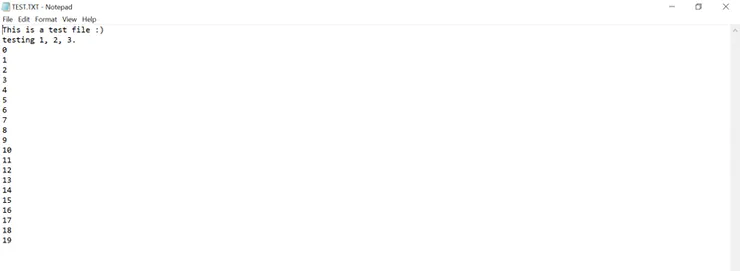
使用Arduino从SD卡读取数据
#include <SPI.h>
#include <SD.h>
File myFile;
void setup() {
// Open serial communications and wait for port to open:
Serial.begin(9600);
while (!Serial) {
; // wait for serial port to connect. Needed for native USB port only
}
Serial.print("Initializing SD card...");
if (!SD.begin(10)) {
Serial.println("initialization failed!");
while (1);
}
Serial.println("initialization done.");
// open the file for reading:
myFile = SD.open("test.txt");
if (myFile) {
Serial.println("test.txt:");
// read from the file until there's nothing else in it:
while (myFile.available()) {
Serial.write(myFile.read());
}
// close the file:
myFile.close();
} else {
// if the file didn't open, print an error:
Serial.println("error opening test.txt");
}
}
void loop() {
// nothing happens after setup
}
以上代码执行的结果:
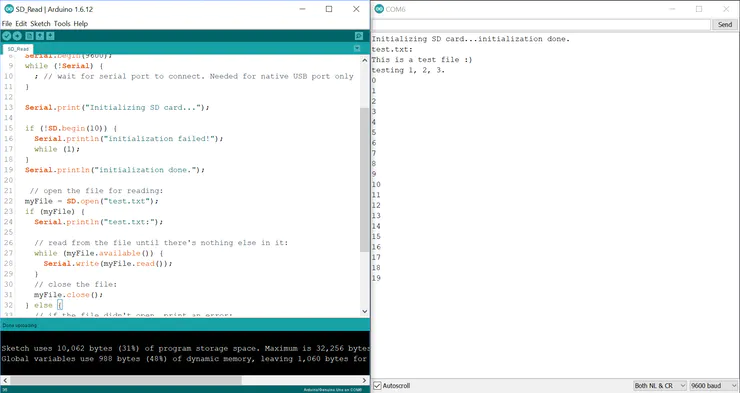
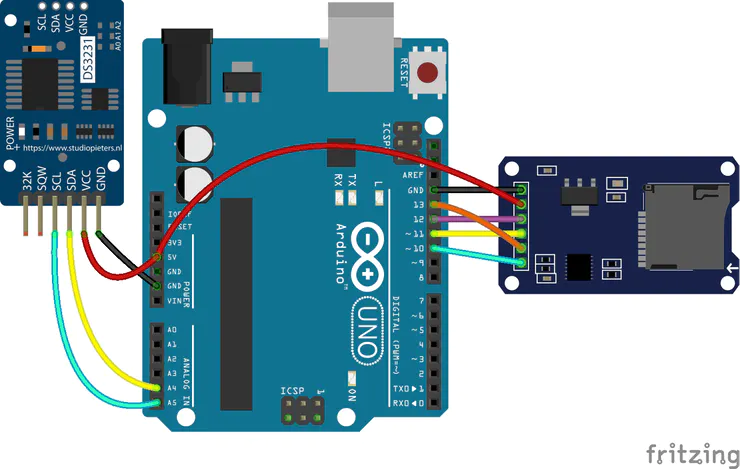
项目:使用DS3231模块将温度数据保存在micro SD上
您可以在这里找到DS3231,除了IC时钟和日历外,该模块还具有温度传感器。
电路图
代码
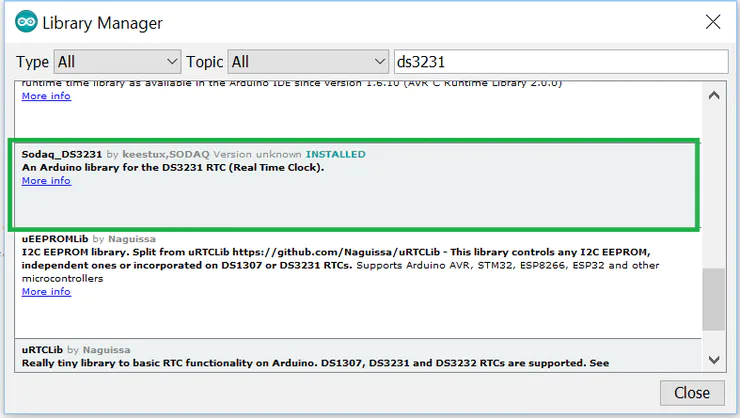
要使用DS3231模块,必须首先将库(Sodaq_DS3231.h)添加到Arduino应用程序。
/*
Save temperature in SD/microSD card every hour with DS3231 + SD/microSD module + Arduino
modified on 15 Apr 2019
by Mohammadreza Akbari @ Electropeak
https://electropeak.com/learn/
*/
#include <SPI.h>
#include <SD.h>
#include <Wire.h>
#include "Sodaq_DS3231.h"
File myFile;
DateTime now;
int newHour = 0;
int oldHour = 0;
void save_temperature() {
myFile = SD.open("temp.txt", FILE_WRITE);
now = rtc.now();
myFile.print(now.hour());
myFile.print(":");
myFile.print(now.minute());
rtc.convertTemperature(); //convert current temperature into registers
myFile.print(",");
myFile.println(rtc.getTemperature()); //read registers and save temperature on deg C
myFile.close();
}
在一天中的不同时间存储温度后,您可以使用图表将此信息绘制到Excel中。
在Excel中绘制图表:
为此,请按照下列步骤操作:
将SD卡连接到PC。
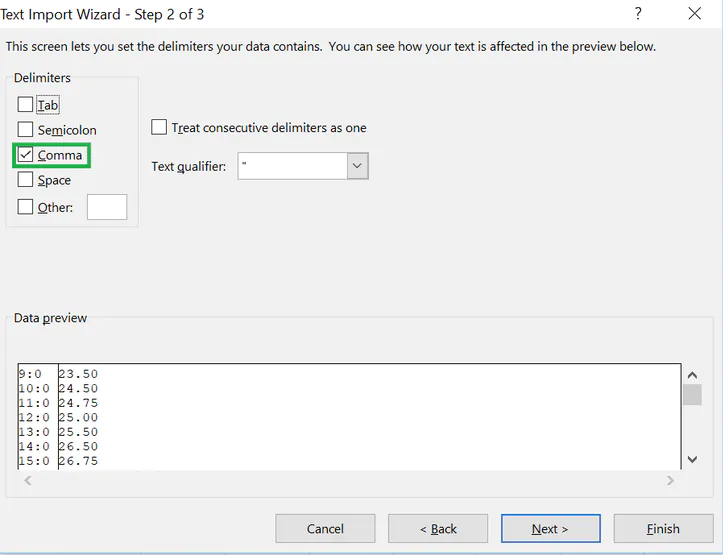
输入Excel软件,然后从数据窗口中选择“来自文本”选项,然后从存储卡中选择文件。


选择单元格并绘制一个图。


下一步是什么?
- 创建一个进入/退出控制设备。使用RFID模块和Arduino,可以节省存储卡上每个对象的出入时间。(为每个对象安排一张RFID卡)
最后
所有需要的文件在下载区均可找到。
via:https://www.hackster.io/electropeak/sd-card-module-with-arduino-how-to-read-write-data-37f390
如果遇到文件不能下载或其他产品问题,请添加管理员微信:ligongku001,并备注:产品反馈

评论(0)

 理工酷
理工酷
 资源下载
资源下载


